Thursday, August 29, 2013
“You Have Lipstick on Your Teeth” Book Review
Have you heard of "You Have Lipstick on Your Teeth"? Oh. Em. Gee. This book is hilarious! Here's a tip... gather up with your girlfriends and organize a book-night party or something like that :) Trust me, they are going to love it! This book is just like if you were talking with your best friend. There may be stories that you can relate to, but I'm sure most of stories will sound like something you can't even imagine would happen! Like I said, just like talking with your best friend.
This book collects stories from 39 women. If you have visited their blogs, you may have an idea on what to expect. They share stories about relationships, motherhood, body changes, everything about being a woman! My favorite stories are "I Have a Dress Problem", "The (Not So) High Price of Fashion" and "Act Like You've Got Sense... Like a Mafia Don". I love the way the authors connect with you on every single story. Sometimes I even felt like I was there with them when it happened!
From cover to cover, this book will make you laugh, cry and giggle like a crazy person-- Gustavo looked at me with wide-open eyes. Lol. But he was not the only one who stared at me, my mom also did... well, everyone who was sitting near me!
I give this book 5 out of 5 stars.
You can order your book at Amazon today. By the way, this could be a great gift for your bestie ;)
Wednesday, August 28, 2013
Less Laundry, More Linking #5
Hey everyone! Is time to link up! Remember, you can share with us a recipe, craft, or anything you have been working on. I can wait to see your work! I've been working on some washi tape DIYs and I've been learning to sew with my mom :) Soon, I will share my projects with all of you. Let's start the link party!
This week our features were picked by you, and are the 3 most visited links from last week.
Thursday, August 22, 2013
Less Laundry, More Linking #4
I'm so happy is Thursday!! Is time to link up to our Less Laundry, More Linking party! Besides, that means I will see Gustavo again ;) He is now studying at an university 3 hours away from me... so yeah, the weekends are pretty exciting for us! Anyways, thank you all so much for stopping by the party again. I can't wait to see what you have created!
This Weeks Features:
Our Most Viewed
My Favorite
Saturday, August 17, 2013
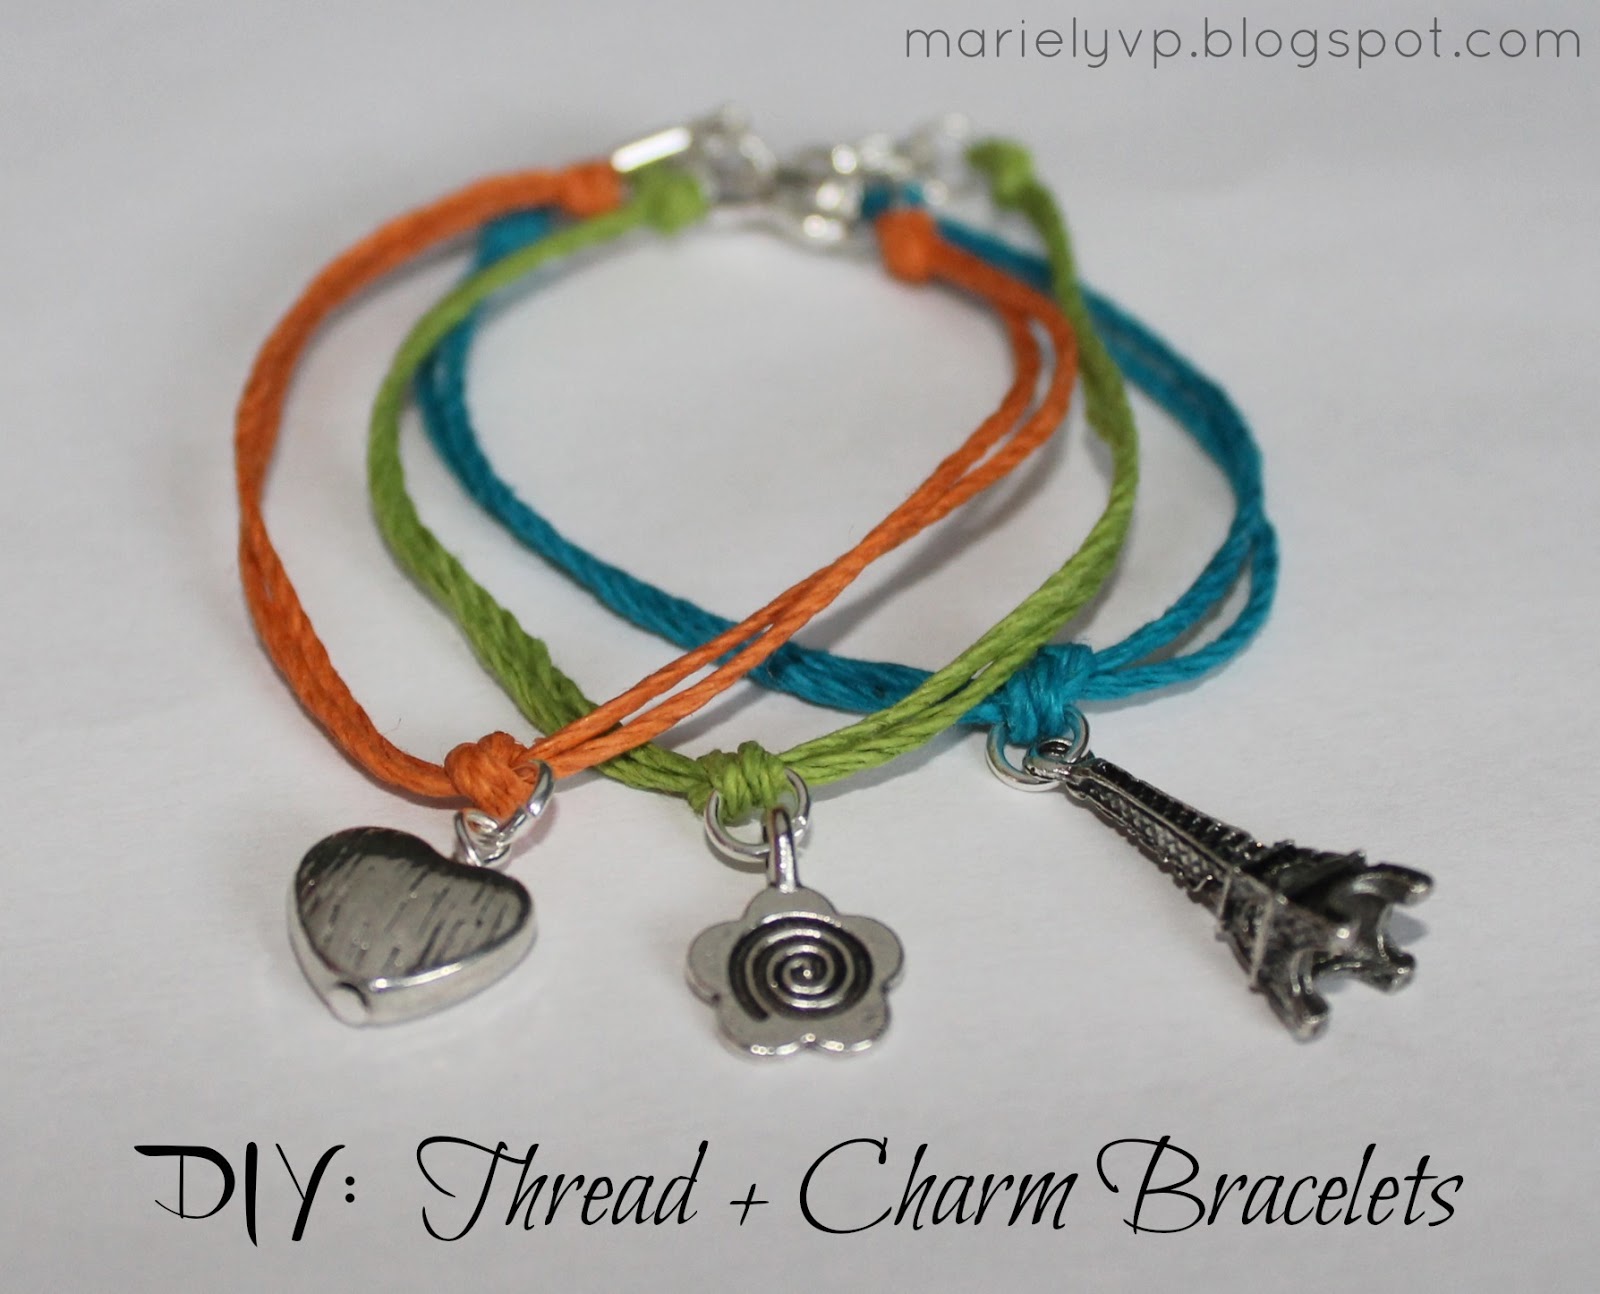
DIY: Thread + Charm Bracelets
My little sister says she's my #1 fan. Isn't she cute? Every time I'm making something, she always wants to be the first one to try it. She loves handmade things as much as I do! She always wear the bracelets I've made her to school. One of her favorites is the thread & charm bracelet. Every time I get a new charm she likes, that means another bracelet I have to make her. So yeah, she has a lot of those bracelets :)
Anyways, since today is my little sister's birthday, I decided to show you how to make her favorite bracelets.

Step 1: You need 24 inches of thread. You may need more or less thread, it all depends on your wrist size. Bend the thread on the middle and add a jump ring.
Step 2: Hold both ends of the thread together and make a knot, as shown on the photo.
Step 3: After making the knot, you will have the thread together like if there was 2 threads. You need to leave a small space and then add a charm. {When leaving the space, you can check it on your wrist... the jump ring will be under the wrist, and the charm will be over the wrist-- in the middle of the wrist, like any other bracelet.}
Step 4: Now you have to make another knot, like in step 2, but this time it will be on the charm.
Step 5: After adding the charm, you need to find the other half of the thread and make a knot. Leave a small piece of thread after the knot, and cut the rest of the thread.
Step 6: Add a cord end cap at the end, as shown in the photo.
Step 7: Add a clasp, and you are done!
What's your favorite color when it comes to bracelets? As you can see, my little sister LOVE brilliant colors!
Anyways, since today is my little sister's birthday, I decided to show you how to make her favorite bracelets.

Materials
Thread
Jump rings
Cord end caps
Clasps
Charms
Chain nose pliers
Diagonal cutting pliers
Photo Tutorial
Step by Step
Step 2: Hold both ends of the thread together and make a knot, as shown on the photo.
Step 3: After making the knot, you will have the thread together like if there was 2 threads. You need to leave a small space and then add a charm. {When leaving the space, you can check it on your wrist... the jump ring will be under the wrist, and the charm will be over the wrist-- in the middle of the wrist, like any other bracelet.}
Step 4: Now you have to make another knot, like in step 2, but this time it will be on the charm.
Step 5: After adding the charm, you need to find the other half of the thread and make a knot. Leave a small piece of thread after the knot, and cut the rest of the thread.
Step 6: Add a cord end cap at the end, as shown in the photo.
Step 7: Add a clasp, and you are done!
The Results
You can make this simple bracelet in any color, with any charm :)
Thursday, August 15, 2013
Less Laundry, More Linking #3
It's time to link up! Thank you so much for stopping by to our party again. Brenna and I are having fun checking out everyone's links. I have found some new projects I would love to try one day. My to-do list is getting bigger and bigger!
Be sure to follow our Pinterest board, we are sharing our features and a few of our favorite links from each week.
Our Features:
Most Viewed
My favorite
Brenna's favorite
Subscribe to:
Posts (Atom)