

Step 1: You'll need the following materials- safety pins (size 00 or 0 recommended), seed beads (or any bead that fits on the safety pin) and elastic cord.
Step 2: Open the safety pin and thread the beads onto the pin (leave a space to be able to close the pin).
Step 3: Repeat step 2 until you have enough safety pins beaded (the amount of pins will depend on your wrist size).
Step 4: Cut two pieces of elastic cord. Thread one of the cords through the top hole of one pin and then though the bottom hole of another pin. Repeat the step with the second cord.
Step 5: Tie the end of the cords together and that's it, your bracelet is ready!
Here's another style (my favorite)
For me, this style looks better. The only step you have to add for this style is, adding an empty safety pin between every beaded safety pin.
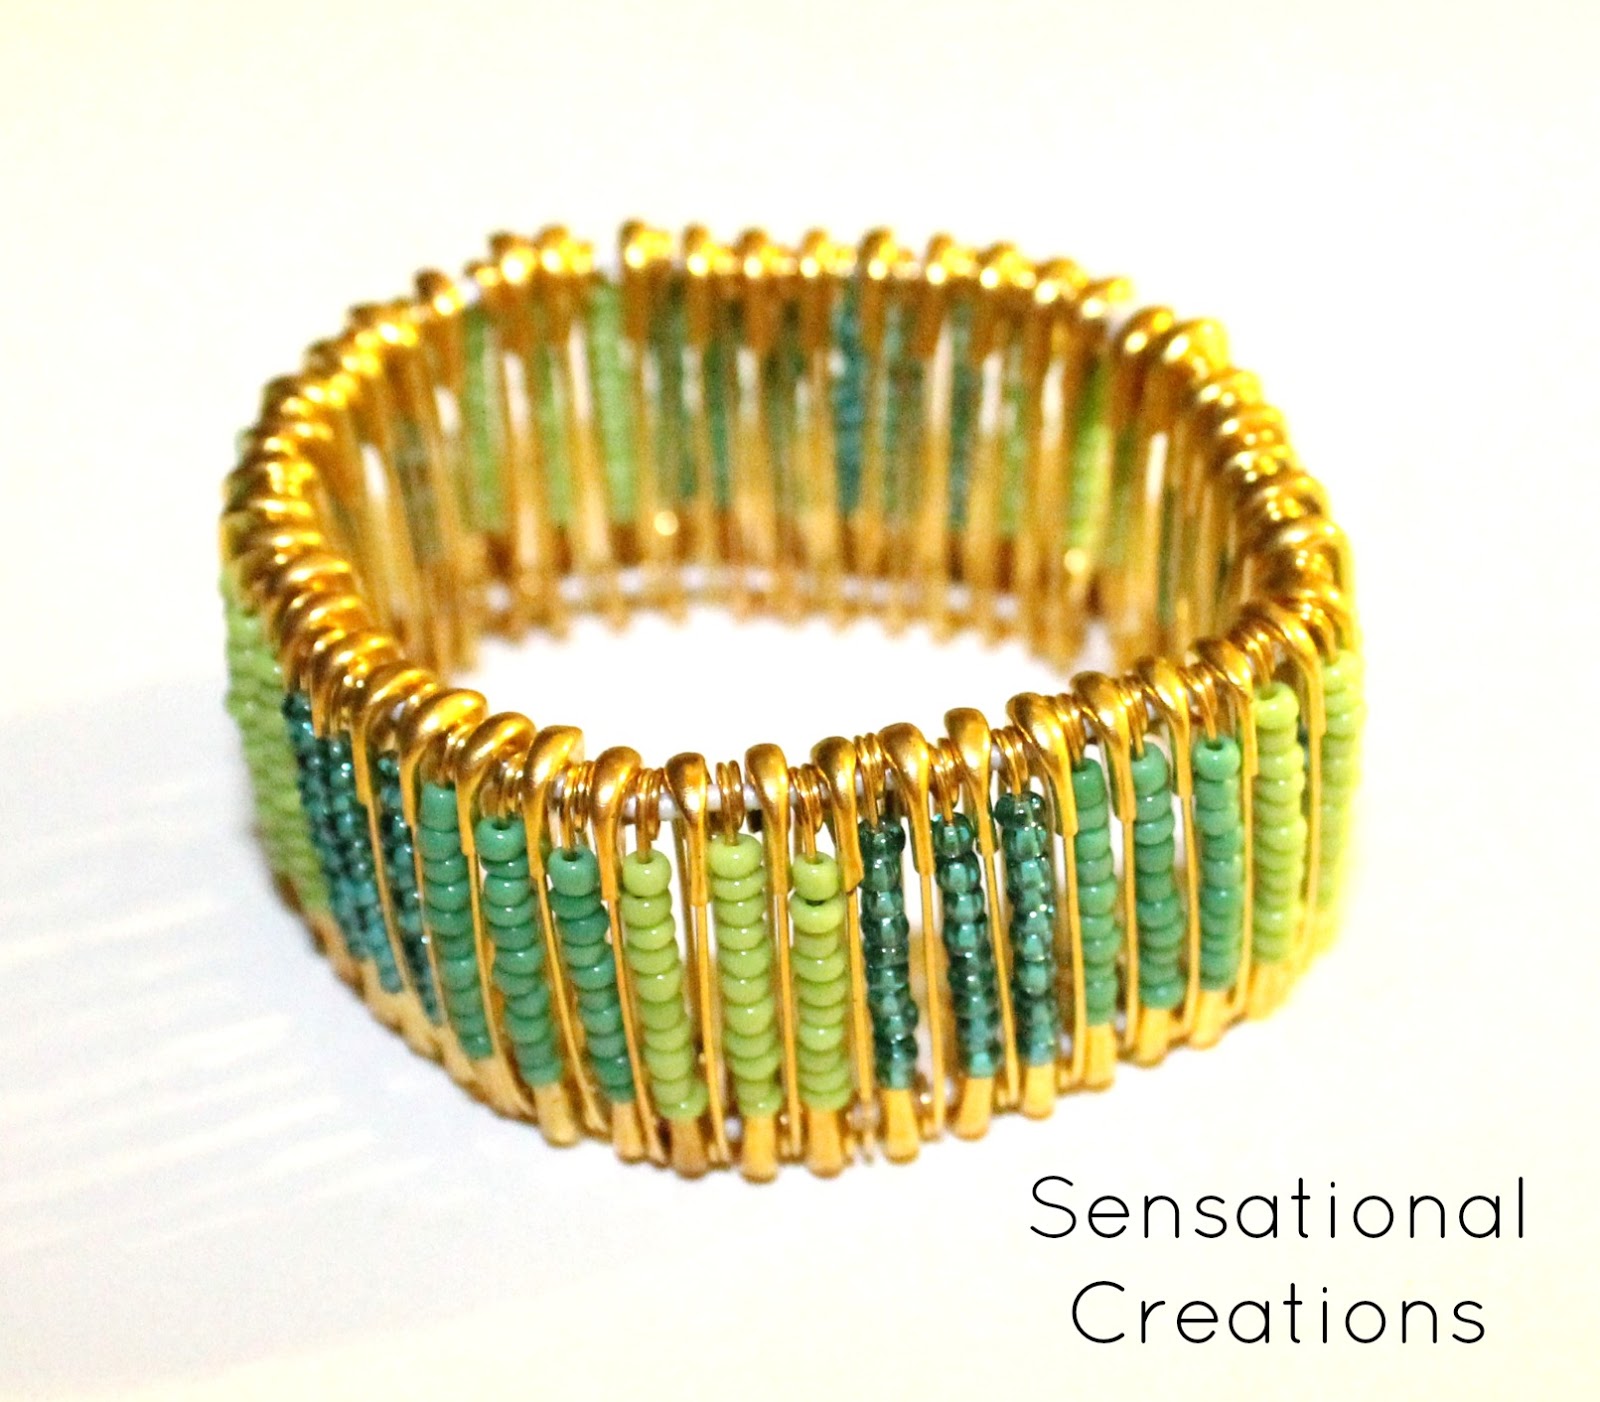
and here are some photos that I shared on Instagram...


So, tell me... did you like this type of bracelet?

This is really cool and inexpensive. You can constantly change the colours.
ReplyDeleteYes and it's pretty easy to make :)
DeleteThat's so adorable and creative :)
ReplyDeleteninikat.blogspot.com
Thanks for following my blog :) I am now following you thanks. Love the blue/teal bracelet very unique ~~~
ReplyDeleteThanks! :) glad to see you stopped by
DeleteI love them. The second one is my favorite, but you probably already know that. I love the new background! Your button is so cute!
ReplyDeleteThanks Brenna! Haha yea, I knew you would like the second one! I'm glad you like my new background and button :D I can't believe I did it my self!!! All thanks to the lovely Ashton for her tutorial :)
Deletelove these bracelets. I've been meaning to try this forever! thanks for joining in the blog hop! xo, shari
ReplyDeleteHi, sure! Thanks for co-hosting :)
DeleteHi! Thanks so much for visiting my page. I'm loving the Aveeno dry shampoo so far...tops all of the dry shampoos I've tried to date. This is such a cute and creative idea...I just might have to try!
ReplyDeleteHey Carly! Thanks for letting me know, that's so sweet of you :) I will definetely try it!
DeleteEasy and cute idea :) I love the blue one (Im a blue gal!)
ReplyDeleteI wanted to invite you to join our weekly Meet & Greet Blog Hop! It runs Friday night thru Monday. Come link up if you have time this weekend! :)
http://createdbylaurie.blogspot.com/2013/02/meet-greet-blog-hop-weekend-12.html
Thanks Laurie :)
DeleteI will go over and link up right know! Thanks for the invite :)
Very pretty! I would love to have you join me on The Creative HomeAcre Hop today!
ReplyDeletehttp://www.theselfsufficienthomeacre.com/2013/02/the-creative-homeacre-hop.html
Sure! I will stop by in a couple of minutes :) Thanks!!
DeleteWow...they turn out really cute. What a fun idea. A new follower from the Meet and Greet Blog Hop. Thanks for joining us.
ReplyDeleteAnne Marie
http://moanasuniquedesigns.blogspot.com/
Thanks Anne!! :)
DeleteWow, this is really so cute. I'll really try this one. By the way, I am following you now via GFC from the blog hop. :)
ReplyDeletehttp://ennspired.blogspot.com
Thank you so much Najmah! I will stop by your blog right away :)
DeleteWOW! This is simpler than I thought! Hi! I'm Vickilicious from http://thegreekhousewife.blogspot.gr/ I'm your newest follower all the way from Greece and the "Nice to meet you" Blog Hop. Looking forward to reading your blog! Stop by my place and follow back if you like what you see! Thanks!
ReplyDeleteThank you Vicky! :) I will sure stop by your blog!
DeleteWhat a cute idea! I love this, it makes a darling bracelet!
ReplyDeleteFollowing you from the GFC Blog Hop! I look forward to getting to know you and your blog! Stop by, say hi and let's be friends!!
Brittany Michelle
blog.thesapphirebee.com
Hi Brittany! Thanks! I really like it because is simple but cute :) Thanks for stopping by my blog, I will visit yours right away ;)
DeleteIt looks super cute, and like you'd need a lot of patience :)
ReplyDeleteThanks for stopping by my blog from the Meet and Greet hop.
I'm following back! Brie @ Breezy Pink Daisies
Thank you Brie!! :)
DeleteVery clever and adorable!
ReplyDeleteThanks so much!
DeleteThat's too much fun for my non crafty brain to cope with. I love the finished product though. Maybe a fun summer project with the kids! Thanks for hooking up to the Hump Day Hook Up
ReplyDeleteYea, it's perfect for the kids! Sure, thanks for inviting me over :)
DeleteOooh! I LOVE beading! I don't write about it much lately, but I so love it. http://www.mylifeaslucille.com/2013/03/the-dirt-on-some-of-my-favorite-things.html
ReplyDeleteNice to meet you via the Hump Day Hook Up and looking forward to more beading inspiration. ;-)
Weird, but honestly unique. It's cute! However, I don't think something was mentioned about keeping the safety pins securely closed. Although it would, most probably, take intentional effort to open a pin, it would be better to be cautious. Besides that, I have no more issue about it and would definitely try it. :)) Paige @Compelling Creations
ReplyDeleteThanks Paige!
DeleteThese look fabulous!
ReplyDeleteMy coworker's mom made this for her and added a face to a watch. Beautiful :0)
ReplyDeleteGreat idea!! Thanks :)
Delete