Jump rings
Pearls (or any bead you like)
Chain nose pliers
Round nose pliers
Diagonal cutting pliers
Step 2: Open one jump ring and insert two jump rings. Then, add another jump ring at the end as shown in the photo.
Step 3: You will now have four jump rings. Grab two of them keeping the other two open.
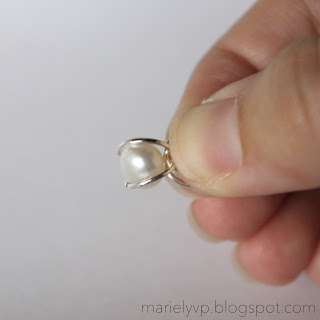
Step 4: Place the pearl inside of those two jump rings you were keeping open.
Step 5: Move the other two jump rings closer to keep the pearl entirely inside.
Step 6: Keep adding jump rings and pearls the same way as step 2 and 4.
Step 7: Add a clasp at the end and that's it!
The Results
I think this is my new favorite bracelet! I use white and cream pearls because those are two of my favorite colors to wear. This bracelet looks simple and you can wear it everyday :)
Have you tried this bracelet before? Which color would you like to try?


.JPG)


This is so pretty! I'm not sure I could make it myself but I love it!
ReplyDeleteThanks Heather! Don't say that! I'm sure you could make it :)
DeleteI definitely want to give this a try! It's so cute! How long did this take? I think any pearl would look pretty but for myself to wear I'd want off-white pearls.
ReplyDeleteThank you :) It took me like an hour and a half but, that was because I use irregular pearls and it was a little bit difficult to find a way to fit them inside the jump rings. If you make it with round pearls (or beads), it should take you less than that.
DeleteIt's so pretty! Thanks so much for sharing the tutorial. Maybe one day I'll try!
ReplyDeleteThanks Laura! Let me know if you try it :) I would love to hear how it turn out
DeleteVery nice tutorial.
ReplyDeleteThanks Lizzy!
DeleteEstá preciosa, pero si hay algo que no tengo es paciencia y arte para estas cosas. Por eso hay gente como tú que me las puede vender y problema resuelto. Está uy bonita de verdad.
ReplyDeletejaja muchas gracias Sonia! Me alegra que te guste. Pero sabes que? Yo si creo que puedes hacerla ;)
DeleteThis is so beautiful. I definitely need one of these bracelets! I love it, such a good tutorial.
ReplyDeleteThank you my friend!!
DeleteThat looks super complicated but your tutorial is so easy to follow!
ReplyDelete~Kelsy
http://looseendscraftblog.com
Yes, it definitely seems complicated but it's super easy to make! I'm not going to lie, I had some problems with those pearls but, that's because they where irregular and not rounded. Anyways, it's way better if you use rounded beads :)
DeleteGorgeous! Thanks so much for sharing at Wicked Good Wednesdays. You've been featured!
ReplyDeleteYay! Thanks so much Rachel! :)
DeleteHi there.
ReplyDeleteFirstly, lovely bracelet and great tutorial, thank you!
I am stuck on step 1 though... what size bead in comparison to the jump ring should be used? e.g. if I'm using 5mm round beads, should I use the same diameter (5mm) jump rings?
Thanks in advance.
Hi! You should use a bigger bead in comparison with the jump ring. That way, the bead won't get through the ring. Thanks for stopping by! Let me know if you need anything else.
Deletewhat are gauge for the jumping ring, please?
ReplyDeleteIt depends on the size of the pearls that you are going to use. My recommendation is that you buy them together so you can compare it.
DeleteBella la pulsera. Gracias por compartir
ReplyDelete¡Gracias! Y a la orden :)
Deletehanks so much.
ReplyDeleteCan You please tell -whats size is pearls and jump rings? Thank you.
ReplyDeleteHi! I made this a couple of years ago so I honestly don't remember the size of the jump rings. I used irregular pearls so they were of different sizes. You should use a bigger pearl in comparison with the jump ring. That way, the pearl won't get through the ring. So the size of the jump ring, depends on the size of the pearls that you are going to use. My recommendation is that you buy them together so you can compare them. Also, rounded pearls works better than the irregular pearls I used. Hope this helps!
Deleteis there a video tutorial available somewhere? I feel like i may be a bit too stupid to figure out some simple little transitional instruction between the pictures. I would really love to make this bracelet for my mom's birthday cus its beautiful and i'm too poor to buy her a real one. thank you.
ReplyDeleteHi! Unfortunately, I didn't make a video tutorial for this. Sorry.
Delete